You have the perfect photo, but it is too large to email. Or maybe you need a profile picture for a website, but the dimensions are all wrong. Resizing images is one of those tasks that everyone needs to do eventually, yet many people do not know where to start. The good news is that resizing an image does not require expensive software or technical expertise.
Whether you need to reduce file size for email, change dimensions for social media, or prepare images for your website, this guide will walk you through everything you need to know. You will learn multiple methods to resize images, compress file sizes, and get professional results without losing quality. All using free tools that work in your browser
What Is Image Resizing and Why Do You Need It?
Image resizing means changing the dimensions (width and height) of an image, reducing its file size, or both. Unlike cropping, which removes parts of the image, resizing scales the entire image up or down.
Here is why you might need to resize an image:
- Email attachments: Most email services have size limits. Resizing reduces file size so your message gets through.
- Website loading speed: Large images slow down websites. Resized images load faster and improve user experience.
- Social media posts: Each platform has recommended dimensions. Resizing ensures your images look their best.
- Printing: Printers require specific resolutions. Resizing prepares images for physical output.
- Storage space: Smaller images take up less space on your devices and in the cloud.
What People Use Image Resizing For
Here are some real ways people use image resizing tools in their daily lives and work.
Emailing Photos to Friends and Family
A parent wants to send vacation photos to relatives. The images are 10MB each, too large for email. Using a photo resizer, they reduce the file size and send the photos without any issues.
Uploading Product Images to an Online Store
An e-commerce seller has high-resolution product photos. Their online store requires images under 1MB. They resize and compress the images, keeping quality while meeting the store’s requirements.
Creating Social Media Content
A social media manager prepares images for Instagram, Facebook, and Twitter. Each platform has different dimension requirements. They use an image resizer tool to create multiple versions of the same image for each platform.
Building a Website or Blog
A blogger takes beautiful high-resolution photos, but they slow down the website. They reduce image size and file size, improving page load speed and SEO rankings.
Applying for Jobs Online
A job seeker needs to upload a profile photo to LinkedIn or a portfolio website. The site has dimension and file size limits. They resize their photo to meet the requirements.
Saving Storage Space
A photographer has thousands of images taking up space on their hard drive. They batch resize older images to a smaller size, freeing up gigabytes of storage.
How to Resize an Image: Step-by-Step Methods
There are several ways to resize images, from simple online tools to built-in operating system features. Here is a step by step guide for each approach.
Method 1: Using an Online Image Resizer (Easiest)
Online tools are the fastest and most convenient option for most people. They work on any device with an internet connection and require no software installation.
- Open your preferred image resizer tool in your browser. Look for one that processes images locally for privacy.
- Upload the image you want to resize. Most tools support JPG, PNG, and WebP formats.
- Enter your desired width and height. Many tools maintain aspect ratio automatically when you lock the proportions.
- Choose your output quality if available. For web use, 80-90 percent quality is usually sufficient.
- Click resize and download your resized image.
Pro tip: Always lock the aspect ratio when resizing. This prevents your image from becoming stretched or squashed. If your tool does not have this option, calculate the proportional dimensions manually.
Method 2: Using Built-in Operating System Tools
Both Windows and Mac have basic image resizing capabilities built in, with no extra software needed.
On Windows: Right-click on your image file, select “Open with” then “Photos.” Click the three dots menu, select “Resize image,” and choose from preset sizes or enter custom dimensions. You can also use the Snipping Tool to capture and resize.
On Mac: Open your image in Preview. Go to Tools > Adjust Size. Enter your desired width and height. Make sure “Scale proportionally” is checked to maintain aspect ratio. Click OK, then save.
Method 3: Using Free Software (GIMP)
GIMP is a free, open-source image editor that offers professional-grade resizing capabilities.
- Open your image in GIMP.
- Go to Image > Scale Image.
- Enter your desired width and height. The chain link icon locks the aspect ratio.
- Choose an interpolation method. “Cubic” or “Sinc” produces the best quality for reducing image size.
- Click Scale, then export your resized image.
Method 4: Using Microsoft Paint
Paint is available on every Windows computer and is surprisingly useful for basic resizing.
- Open your image in Paint.
- Click on the “Resize” button in the toolbar.
- Choose “Percentage” or “Pixels” as your unit.
- Enter your desired values. Check “Maintain aspect ratio” to prevent distortion.
- Click OK, then save your image.
Method 5: Using Command Line (For Advanced Users)
For those comfortable with the command line, ImageMagick is a powerful free tool that can resize images in bulk.
- Resize a single image:
convert input.jpg -resize 800x600 output.jpg - Resize by percentage:
convert input.jpg -resize 50% output.jpg - Resize all images in a folder:
for %f in (*.jpg) do convert "%f" -resize 800x600 "resized_%f"
Step-by-Step: How to Reduce Image File Size
Sometimes you need to reduce the file size (kilobytes or megabytes) without changing the dimensions. This is called compression.
- Open your chosen picture resizer or compression tool.
- Upload your image.
- Look for a quality slider or compression level setting.
- Adjust the quality downward. A setting of 80-85 percent often reduces file size significantly with minimal visible quality loss.
- Check the new file size. If it is still too large, lower the quality further.
- Download your compressed image.
Important: Compression is different from resizing. You can compress an image without changing its dimensions. This is useful when you need to keep the same size but reduce file size for email or web use.
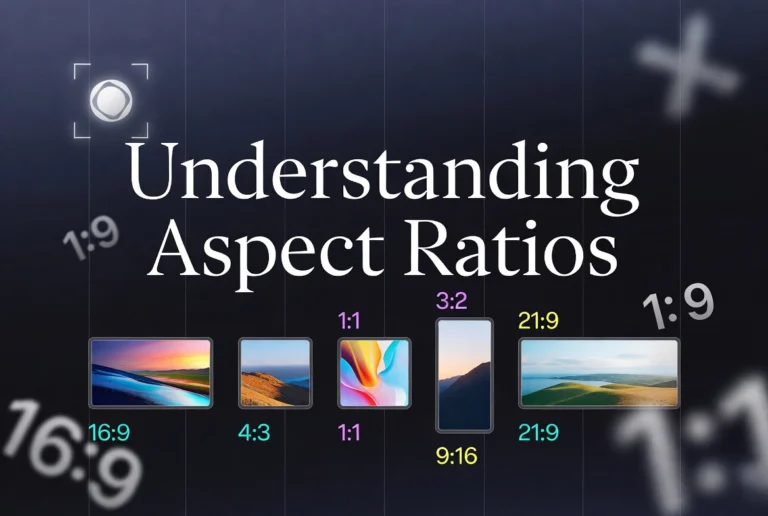
How to Resize Images for Specific Platforms
Different platforms have different requirements. Here are the recommended dimensions for common use cases.
Resize Photo for Social Media
- Instagram feed post: 1080 x 1080 pixels (square)
- Instagram story: 1080 x 1920 pixels (vertical)
- Facebook post: 1200 x 630 pixels (landscape)
- Twitter post: 1600 x 900 pixels (landscape)
- LinkedIn profile banner: 1584 x 396 pixels
- Pinterest pin: 1000 x 1500 pixels (vertical)
Resize Photo for Email
Email clients often block large images. Resize your images to under 1MB and dimensions no wider than 600-800 pixels for best results.
Resize Photo for Website
Website images should be as small as possible without visible quality loss. For most websites, images between 1200 and 2000 pixels wide are sufficient. File sizes under 200-300KB are ideal for fast loading.
Resize Photo for Printing
Printing requires higher resolution. Aim for 300 DPI (dots per inch). For a 4×6 inch print, this means 1200 x 1800 pixels. For an 8×10 inch print, 2400 x 3000 pixels.
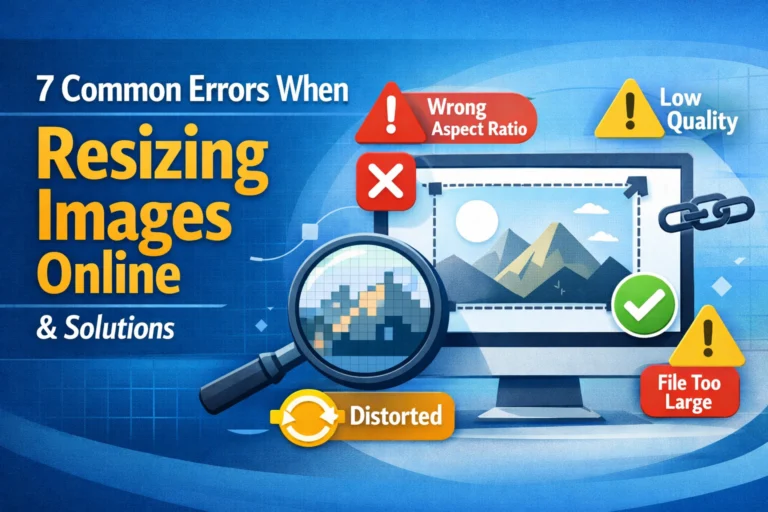
Common Mistakes When Resizing Images
Avoid these common pitfalls to get clean, professional results.
Mistake 1: Stretching or Squashing the Image
Resizing without locking the aspect ratio causes distortion. People look too wide or too tall. Always maintain the original proportions unless you intentionally want a stretched effect.
Mistake 2: Making Images Too Small
Once you reduce an image size, you cannot easily enlarge it without losing quality. Always keep a copy of your original image. Resize a copy, not the original.
Mistake 3: Using Too Much Compression
Over-compressing creates visible artifacts like blocky areas and blurry details. Find the balance between file size and quality. Test different settings to see what works for your image.
Mistake 4: Ignoring File Format
Different formats handle resizing differently. JPG is best for photographs. PNG is best for graphics with text or sharp lines. WebP is best for web use where file size matters.
Mistake 5: Resizing Then Cropping
If you need both resizing and cropping, consider the order. Cropping first then resizing often produces better results because you remove unwanted areas before scaling.
Best Practices for Image Resizing
Follow these best practices to get the best results every time.
Always Keep a Copy of Your Original
Before resizing, save a copy of your original image. This gives you a fallback if something goes wrong or if you need different dimensions later.
Lock the Aspect Ratio
Most tools have a chain or lock icon that maintains proportions. Use it every time. If your tool does not have this feature, calculate the proportional dimensions manually.
Choose the Right Output Format
JPG for photos, PNG for graphics with transparency or text, WebP for modern web use. Each format has strengths and weaknesses. Choose based on your final use case.
Test Different Quality Settings
Do not assume maximum quality is best. For web images, test quality settings between 70 and 90 percent. You will often find that lower settings produce acceptable quality with much smaller file sizes.
Use Batch Processing for Multiple Files
If you have many images to resize, look for a tool that supports batch processing. This saves significant time compared to resizing files one by one.
Resize Image vs Compress Image: What Is the Difference?
Many people confuse resizing with compression. They are different operations with different purposes.
Resize Image
Changing the dimensions (width and height) of an image. This physically changes how many pixels the image contains. Resizing always changes the file size, often significantly.
Compress Image
Reducing the file size without changing dimensions. Compression uses algorithms to remove redundant data. You can compress an image without resizing it.
When to resize: You need specific dimensions for a website, social media, or printing.
When to compress: You need to reduce file size for email or web use but want to keep the same dimensions.
When to do both: You need a specific dimension AND smaller file size.
Security and Privacy Considerations
When using online image resizer tools, your privacy matters. Here is what to look for.
Client-Side Processing Is Safer
The best online image resizers process your images locally in your browser. Nothing is uploaded to any server. This is essential for personal photos, family pictures, and sensitive images.
Avoid Tools That Require Accounts
If an image resizer asks you to create an account or provide an email address, be cautious. Legitimate tools do not need your personal information to resize an image.
Check for HTTPS Encryption
Look for the padlock icon in your browser’s address bar. This ensures that any data transmitted is encrypted. Even better, choose tools that do not transmit data at all.
Delete Uploaded Images from Servers
If you use a server-based tool, check if they have a policy to delete uploaded images after processing. Some keep images for days or weeks.
Frequently Asked Questions
1. Does resizing an image reduce quality?
Reducing image size (making it smaller) typically does not reduce visible quality. In fact, it can make images look sharper because you are removing pixels. Enlarging an image (making it bigger) almost always reduces quality because the software must invent new pixels.
2. What is the best free image resizer?
The best tool depends on your needs. For quick online resizing, tools that process locally in your browser are excellent. For advanced control, GIMP is a powerful free option. For simple needs, the built-in tools in Windows and Mac work well.
3. Can I resize multiple images at once?
Yes. Many online tools support batch processing. On Windows, you can select multiple images, right-click, and choose “Resize pictures” if you have PowerToys installed. On Mac, you can batch resize in Preview by selecting multiple files before exporting.
4. How do I resize an image without losing quality?
To resize without losing quality, only make images smaller, never larger. Use a tool that maintains aspect ratio. For compression, use quality settings around 80-90 percent. Always keep a copy of your original image.
5. What is the difference between resizing and cropping?
Resizing scales the entire image up or down. Cropping removes parts of the image, usually from the edges. Cropping changes what is visible. Resizing changes how large everything appears.
6. How do I resize a photo for social media?
Check the recommended dimensions for your specific platform. Use an image resizer tool to set those exact dimensions. Maintain aspect ratio to prevent distortion. Save as JPG for photos or PNG for graphics with text.
7. Why does my resized image look blurry?
You likely enlarged the image (made it bigger). Enlarging always causes some quality loss because software must create new pixels. If you must enlarge, use a tool with good interpolation algorithms like “Cubic” or “Sinc” in GIMP.
8. Can I resize an image on my phone?
Yes. Both iPhone and Android have built-in photo editing tools that include resizing. You can also download free resizing apps from your app store. Many online resizers also work on mobile browsers.
9. What resolution should I use for web images?
For most websites, images between 1200 and 2000 pixels wide are sufficient. File sizes under 200-300KB are ideal. Use 72 DPI (dots per inch) for web, as higher DPI does not improve display on screens.
10. What resolution should I use for printing?
Aim for 300 DPI (dots per inch). For a 4×6 inch print, this means 1200 x 1800 pixels. For an 8×10 inch print, 2400 x 3000 pixels. Lower resolutions will look pixelated or blurry when printed.
Conclusion: Resize Images with Confidence
Resizing images is a fundamental skill that everyone needs at some point. Whether you are sending photos to family, posting on social media, or building a website, knowing how to resize correctly saves time and frustration.
Start with online tools for quick, easy resizing. Use built-in operating system tools when you do not have internet access. For advanced needs, free software like GIMP offers professional-grade control. Always keep a copy of your original image, maintain aspect ratio, and test different quality settings to find the perfect balance between file size and quality.
The next time you need to resize an image, you will know exactly what to do. Choose your method, follow the steps, and enjoy your perfectly sized images.